
- 1. font-size 프로퍼티
- 2. font-family 프로퍼티
- 3. font-style / font-weight 프로퍼티
- 4. font Shorthand
- 5. line-height 프로퍼티
- 6. letter-spacing 프로퍼티
- 7. text-align 프로퍼티
- 8. text-decoration 프로퍼티
- 9. white-space 프로퍼티
- 10. text-overflow 프로퍼티
- 11. word-wrap 프로퍼티
- 12. word-break 프로퍼티
- Reference
폰트 및 텍스트 관련 프로퍼티는 폰트의 크기, 폰트의 지정, 폰트의 스타일, 텍스트 정렬 등을 정의한다.
1. font-size 프로퍼티
텍스트의 크기를 정의한다.
<!DOCTYPE html>
<html>
<head>
  <style>
    .font-size-40 { font-size: 40px; }
    .font-size-2x { font-size: 2.0em; }
    .font-size-150ps { font-size: 150%; }
    .font-size-large { font-size: large; }
  </style>
</head>
<body>
  <p>default font size: 16px</p>
  <p class='font-size-40'>font-size: 40px</p>
  <p class='font-size-2x'>font-size: 2.0em</p>
  <p class='font-size-150ps'>font-size: 150%</p>
  <p class='font-size-large'>font-size: large</p>
</body>
</html>
2. font-family 프로퍼티
폰트를 지정한다. 컴퓨터에 해당 폰트가 설치되어 있지 않으면 적용되지 않는다.
폰트는 여러 개를 동시에 지정이 가능하다. 첫번째 지정한 폰트가 클라이언트 컴퓨터에 설치되어 있지 않은 경우, 다음에 지정된 폰트를 적용한다. 따라서 마지막에 지정하는 폰트는 대부분의 OS에 기본적으로 설치되어 있는 generic-family 폰트(Serif, Sans-serif, Mono space)를 지정하는 것이 일반적이다.

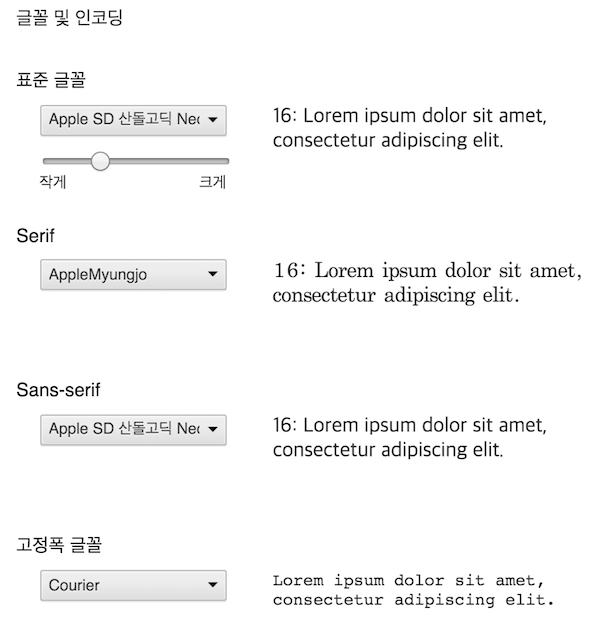
generic-family 폰트
다음은 맥용 크롬 브라우저의 generic-family 폰트 설정 화면이다.
폰트명은 따옴표로 감싸주며 폰트명이 한단어인 경우는 따옴표로 감싸주지 않아도 된다.
<!DOCTYPE html>
<html>
<head>
  <style>
    .serif {
      font-family: "Times New Roman", Times, serif;
    }

    .sans-serif {
      font-family: Arial, Helvetica, sans-serif;
    }

    .monospace {
      font-family: "Courier New", Courier, monospace;
    }
  </style>
</head>
<body>
  <h1>font-family</h1>
  <p class="serif">Times New Roman font.</p>
  <p class="sans-serif">Arial font.</p>
  <p class="monospace">Courier New font.</p>
</body>
</html>
3. font-style / font-weight 프로퍼티
font-style 프로퍼티는 이탤릭체의 지정, font-weight 프로퍼티는 폰트 굵기 지정에 사용된다.
<!DOCTYPE html>
<html>
<head>
  <style>
    p { font-size: 2.0em; }

    /*
      font-style
      normal / italic / oblique
    */
    .italic {
      font-style: italic;
    }

    /*
      font-weight
      100 ~ 900 or normal / bold / lighter / bolder
    */
    .light {
      font-weight: lighter;
    }
    .thick {
      font-weight: bold;
    }
    .thicker {
      font-weight: 900;
    }
  </style>
</head>
<body>
  <p>normal style.</p>
  <p class="italic">font-style: italic</p>

  <p class="light">font-weight: lighter</p>
  <p class="thick">font-weight: bold</p>
  <p class="thicker">font-weight: 900</p>
</body>
</html>
4. font Shorthand
Shorthand Syntax
font : font-style(optional) font-variant(optional) font-weight(optional) font-size(mandatory) line-height(optional) font-family(mandatory)
/* size | family */
font: 2em "Open Sans", serif;

/* style | size | family */
font: italic 2em "Open Sans", sans-serif;

/* style | variant | weight | size/line-height | family */
font: italic small-caps bolder 16px/1.2 monospace;

/* style | variant | weight | size/line-height | family */
/* font-variant: small-caps; 소문자를 대문자로 만든다. 단 크기는 일반 대문자에 비해 더 작다.*/
font: italic small-caps bolder 16px/3 cursive;
5. line-height 프로퍼티
텍스트의 높이를 지정한다. 텍스트 수직 정렬에도 응용되어 사용된다.
<!DOCTYPE html>
<html>
<head>
  <style>
    .small {
      line-height: 70%; /* 16px * 70% */
    }
    .big {
      line-height: 1.2; /* 16px * 1.2 */
    }
    .lh-3x {
      line-height: 3.0; /* 16px * 3 */
    }

  </style>
</head>
<body>
  <p>
    default line-height.<br>
    default line-height.<br>
    대부분 브라우저의 default line height는 약 110% ~ 120%.<br>
  </p>

  <p class="small">
    line-height: 70%<br>
    line-height: 70%<br>
  </p>

  <p class="big">
    line-height: 1.2<br>
    line-height: 1.2<br>
  </p>

  <p class="lh-3x">
    line-height: 3.0<br>
    line-height: 3.0<br>
  </p>
</body>
</html>
다음은 수직 중앙 정렬 예제이다. a 요소의 line-height 값과 a 요소를 감싸는 div 요소의 height 값을 일치시킨다.
<!DOCTYPE html>
<html>
<head>
  <style>
    .button {
      width: 150px;
      height: 70px;
      background-color: #FF6A00;
      border-radius: 30px;
      box-shadow: 5px 5px 5px #A9A9A9;
    }
    .button > a {
      display: block;
      font: italic bold 2em/70px Arial, Helvetica, sans-serif;
      text-decoration: none;
      text-align: center;
    }
  </style>
</head>
<body>
  <div class="button">
    <a href="#">Click</a>
  </div>
</body>
</html>
6. letter-spacing 프로퍼티
글자 사이의 간격을 지정한다.
<!DOCTYPE html>
<html>
<head>
  <style>
    .loose {
      letter-spacing: 2px;
    }
    .tight {
      letter-spacing: -1px;
    }
  </style>
</head>
<body>
  <p>Lorem ipsum dolor sit amet, consectetur adipisicing elit</p>

  <p class="loose">Lorem ipsum dolor sit amet, consectetur adipisicing elit</p>

  <p class="tight">Lorem ipsum dolor sit amet, consectetur adipisicing elit</p>
</body>
</html>
7. text-align 프로퍼티
텍스트의 수평 정렬을 정의한다.
<!DOCTYPE html>
<html>
<head>
  <style>
    h1 { text-align: center; }
    h3 { text-align: right; }
    p.left  { text-align: left; }
    p.justify  { text-align: justify; }
    a  { text-align: center; }
  </style>
</head>
<body>
  <h1>Lorem ipsum</h1>
  <h3>2016.03.07</h3>

  <p class="left">Lorem ipsum dolor sit amet, consectetur adipisicing elit, sed do eiusmod tempor incididunt ut labore et dolore magna aliqua. Ut enim ad minim veniam, quis nostrud exercitation ullamco laboris nisi ut aliquip ex ea commodo consequat. Duis aute irure dolor in reprehenderit in voluptate velit esse cillum dolore eu fugiat nulla pariatur. Excepteur sint occaecat cupidatat non proident, sunt in culpa qui officia deserunt mollit anim id est laborum.</p>

  <p class="justify">Lorem ipsum dolor sit amet, consectetur adipisicing elit, sed do eiusmod tempor incididunt ut labore et dolore magna aliqua. Ut enim ad minim veniam, quis nostrud exercitation ullamco laboris nisi ut aliquip ex ea commodo consequat. Duis aute irure dolor in reprehenderit in voluptate velit esse cillum dolore eu fugiat nulla pariatur. Excepteur sint occaecat cupidatat non proident, sunt in culpa qui officia deserunt mollit anim id est laborum.</p>

  <a href='#'>Reference</a>
</body>
</html>
위 예제의 a 요소에 대한 중앙 정렬은 적용되지 않았다. 이는 a 요소는 inline 요소이기 때문이다. inline 요소는 width 프로퍼티가 없으므로 중앙 개념이 존재하지 않는다. a 요소에 display: block;을 지정한다면 중앙 정렬이 가능할 것이다.
8. text-decoration 프로퍼티
text-decoration 프로퍼티를 사용하여 링크 underline을 제거할 수 있다. 또는 텍스트에 underline, overline, line-through를 추가할 수도 있다.
<!DOCTYPE html>
<html>
<head>
  <style>
    a { text-decoration: none; }

    p:nth-of-type(1) { text-decoration: overline; }
    p:nth-of-type(2) { text-decoration: line-through; }
    p:nth-of-type(3) { text-decoration: underline; }
  </style>
</head>
<body>
  <a href='#'>text-decoration: none</a>

  <p>text-decoration: overline</p>
  <p>text-decoration: line-through</p>
  <p>text-decoration: underline</p>
</body>
</html>
9. white-space 프로퍼티
white space는 공백(space), 들여쓰기(tab), 줄바꿈(line break)을 의미한다. html은 기본적으로 연속된 공백(space), 들여쓰기(tab)는 1번만 실행되며 줄바꿈(line break)은 무시된다. 또한 텍스트는 부모의 가로 영역을 벗어나지 않고 자동 줄바꿈(wrap)된다. white-space 프로퍼티는 이러한 기본 동작을 제어하기 위한 프로퍼티이다.
| 프로퍼티값 | line break | space/tab | wrapping(자동줄바꿈) |
|---|---|---|---|
| normal | 무시 | 1번만 반영 | O |
| nowrap | 무시 | 1번만 반영 | X |
| pre | 반영 | 그대로 반영 | X |
| pre-wrap | 반영 | 그대로 반영 | O |
| pre-line | 반영 | 1번만 반영 | O |
<!DOCTYPE html>
<html>
<head>
  <style>
    div {
      width: 150px;
      height: 150px;
      padding: 10px;
      margin: 40px;
      border-radius: 6px;
      border-color: gray;
      border-style: dotted;
      /*overflow: hidden;*/
    }
    .normal { white-space: normal; }
    .nowrap { white-space: nowrap; }
    .pre    { white-space: pre; }
    .pre-wrap { white-space: pre-wrap; }
    .pre-line { white-space: pre-line; }
  </style>
</head>
<body>
  <h1>white-space</h1>
  <div class="normal"><h3>normal</h3>Lorem   ipsum

    dolor sit amet, consectetur adipisicing elit, sed do eiusmod tempor incididunt ut labore et dolore magna aliqua.</div>
  <div class="nowrap"><h3>nowrap</h3>Lorem   ipsum

    dolor sit amet, consectetur adipisicing elit, sed do eiusmod tempor incididunt ut labore et dolore magna aliqua.</div>
  <div class="pre"><h3>pre</h3>Lorem   ipsum

      dolor sit amet, consectetur adipisicing elit, sed do eiusmod tempor incididunt ut labore et dolore magna aliqua.</div>
  <div class="pre-wrap"><h3>pre-wrap</h3>Lorem   ipsum

    dolor sit amet, consectetur adipisicing elit, sed do eiusmod tempor incididunt ut labore et dolore magna aliqua.</div>
  <div class="pre-line"><h3>pre-line</h3>Lorem   ipsum

    dolor sit amet, consectetur adipisicing elit, sed do eiusmod tempor incididunt ut labore et dolore magna aliqua.</div>
</body>
</html>
아래는 float 대신 inline-block을 사용한 가로 정렬 예제이다.
<!DOCTYPE html>
<html>
<head>
<meta charset="UTF-8">
<meta name="viewport" content="width=device-width, initial-scale=1.0">
<meta http-equiv="X-UA-Compatible" content="ie=edge">
<title>Infinite looping Crousel Slider</title>
<style>
@import url(https://fonts.googleapis.com/css?family=Open+Sans:300,400);
body {
font-family: "Helvetica Neue", Helvetica, Arial, sans-serif;
color: #58666e;
background-color: #f0f3f4;
}
.carousel-view {
/* 자식 컨텐츠 너비에 fit */
display: inline-block;
position: relative;
margin: 0 auto;
border: 1px dotted red;
}
.carousel-container {
/* 자식 컨텐츠의 줄바꿈을 무시하여 1줄로 가로 정렬한다. */
white-space: nowrap;
/* inline-block 레벨 요소 뒤에 공백(엔터, 스페이스 등)이 있는 경우,
정의하지 않은 space(4px)가 자동 지정된다. 이것을 회피하는 방법이다. */
font-size: 0;
margin: 0;
padding: 0;
}
.carousel-item {
display: inline-block;
list-style: none;
padding: 5px;
}
.carousel-item:last-child {
margin-right: 0;
}
.carousel-control {
position: absolute;
top: 50%;
transform: translateY(-50%);
font-size: 2em;
color: #fff;
background-color: transparent;
border-color: transparent;
cursor: pointer;
z-index: 99;
}
.carousel-control:focus {
outline: none;
}
.carousel-control.prev {
left: 0;
}
.carousel-control.next {
right: 0;
}
</style>
</head>
<body>
<div id="carousel" class="carousel-view">
<button class="carousel-control prev">«</button>
<ul class="carousel-container">
<li class="carousel-item">
<a href="#">
<img src="http://via.placeholder.com/400x150/3498db/fff&text=1">
</a>
</li>
<li class="carousel-item">
<a href="#">
<img src="http://via.placeholder.com/400x150/3498db/fff&text=2">
</a>
</li>
<li class="carousel-item">
<a href="#">
<img src="http://via.placeholder.com/400x150/3498db/fff&text=3">
</a>
</li>
</ul>
<button class="carousel-control next">»</button>
</div>
</body>
</html>
10. text-overflow 프로퍼티
부모 영역을 벗어난 wrapping(자동줄바꿈)이 되지 않은 텍스트의 처리 방법을 정의한다. 이 프로퍼티를 사용하기 위해서는 아래의 조건이 필요하다.
- width 프로퍼티가 지정되어 있어야 한다. 이를 위해 필요할 경우 block 레벨 요소로 변경하여야 한다.
- 자동 줄바꿈을 방지하려면 white-space 프로퍼티를 nowrap으로 설정한다.
- overflow 프로퍼티에 반드시 “visible” 이외의 값이 지정되어 있어야 한다.
/* 부모 영역을 벗어난 텍스트를 잘라내어 보이지 않게 하고 말줄임표(...)를 표시한다. */
.truncate {
  width: 150px;             /* width가 지정되어 있어야 한다. */
  white-space: nowrap;      /* 자동 줄바꿈을 방지 */
  overflow: hidden;         /* 반드시 "visible" 이외의 값이 지정되어 있어야 한다. */
  text-overflow: ellipsis;  /* ellipsis or clip */
}
text-overflow 프로퍼티에 설정할 수 있는 프로퍼티 값은 아래와 같다.
| 프로퍼티값 | Description | |
|---|---|---|
| clip | 영역을 벗어난 텍스트를 표시하지 않는다. (기본값) | |
| ellipsis | 영역을 벗어난 텍스트를 잘라내어 보이지 않게 하고 말줄임표(…)를 표시한다. | |
| <!– | <string> | 프로퍼티 값으로 지정한 임의의 문자열을 출력한다. Firefox(9.0~)만 지원하는 기능이다. –> |
<!DOCTYPE html>
<html>
<head>
  <meta charset="utf-8">
  <style>
    div {
      width: 150px; /* width가 지정되어 있어야 한다. */
      height: 150px;
      padding: 10px;
      margin: 40px;
      border-radius: 6px;
      border-color: gray;
      border-style: dotted;
      white-space: nowrap; /* 자동 줄바꿈을 방지 */
      overflow: hidden;    /* 반드시 "visible" 이외의 값이 지정되어 있어야 한다. */
    }
    .clip     { text-overflow: clip; }
    .ellipsis { text-overflow: ellipsis; }
  </style>
</head>
<body>
  <h1>text-overflow</h1>
  <div class="clip">
    <h3>clip</h3>
    Lorem ipsum dolor sit amet, consectetur adipisicing elit
  </div>
  <div class="ellipsis">
    <h3>ellipsis</h3>
    Lorem ipsum dolor sit amet, consectetur adipisicing elit
  </div>
</body>
</html>
11. word-wrap 프로퍼티
한 단어의 길이가 길어서 부모 영역을 벗어난 텍스트의 처리 방법을 정의한다. link 등을 표기할 때(e.g. https://poiemaweb.com/css3-font-text) 그 길이가 매우 길어지는데 이 프로퍼티를 사용하지 않으면 부모 영역을 넘어가게 된다.
<!DOCTYPE html>
<html>
<head>
  <meta charset="utf-8">
  <style>
    div {
      width: 150px;
      height: 150px;
      padding: 10px;
      margin: 40px;
      border-radius: 6px;
      border-color: gray;
      border-style: dotted;
    }
    .word-wrap { word-wrap: break-word; }
  </style>
</head>
<body>
  <h1>word-wrap</h1>
  <div>
    Floccinaucinihilipilification https://poiemaweb.com/css3-font-text
  </div>
  <div class="word-wrap">
    Floccinaucinihilipilification https://poiemaweb.com/css3-font-text
  </div>
</body>
</html>
12. word-break 프로퍼티
한 단어의 길이가 길어서 부모 영역을 벗어난 텍스트의 처리 방법을 정의한다.
word-wrap 프로퍼티는 단어를 어느 정도는 고려하여 개행하지만(.,- 등을 고려한다) word-break: break-all;는 단어를 고려하지 않고 부모 영역에 맞추어 강제 개행한다.
<!DOCTYPE html>
<html>
<head>
  <meta charset="utf-8">
  <style>
    div {
      width: 150px;
      height: 150px;
      padding: 10px;
      margin: 40px;
      border-radius: 6px;
      border-color: gray;
      border-style: dotted;
    }
    .word-wrap  { word-wrap: break-word; }
    .word-break { word-break: break-all; }
  </style>
</head>
<body>
  <div>
    Floccinaucinihilipilification https://poiemaweb.com/css3-font-text
  </div>

  <h1>word-wrap</h1>
  <div class="word-wrap">
    Floccinaucinihilipilification https://poiemaweb.com/css3-font-text
  </div>

  <h1>word-break</h1>
  <div class="word-break">
    Floccinaucinihilipilification https://poiemaweb.com/css3-font-text
  </div>
</body>
</html>