
![]()
Angular 애플리케이션에서 파일 업로드를 구현해보자. 백엔드는 Express와 multer를 사용할 것이다.
웹 애플리케이션 파일 업로드는 크게 두가지의 방식이 있다.
- multipart/form-data
- FormData 객체를 사용하여
<input type="file">요소로 부터 취득한 file 정보를 append하여 서버로 전송하는 방식이다. - applecation/x-www-urlencoded
- 클라이언트는 바이너리 파일을 Base64 인코딩하여 문자열화한 후, 서버로 전송하고 서버는 Base64 인코딩된 문자열을 디코딩하여 저장하는 방식이다. 인코딩으로 인한 성능 이슈가 발생할 수 있다.
applecation/x-www-urlencoded 방식은 인코딩으로 인한 성능 이슈가 발생할 수 있다. multipart/form-data 방식을 사용하여 파일을 전송하는 예제를 작성하여 보자.
1. Backend
Express에서 파일 업로드를 구현하여 보자. 파일 구성은 아래와 같다. 전체 소스코드는 이곳에서 참조할 수 있다.
server/
├── avatars/      # 업로드된 파일의 저장소
├── package.json
└── server.js     # 서버 모듈
바이너리 파일 전송을 위해 multipart/form-data 방식을 지원하는 익스프레스 미들웨어인 multer를 사용한다.
$ npm init -y
$ npm install express multer body-parser cors
multer는 라우터에 삽입하여 미들웨어로 사용한다. multer에 설정 정보를 지정하여 호출하여 upload 객체를 생성한다. 이 upload 객체는 single, array, fields 메소드를 사용할 수 있다. single 메소드를 사용하여 하나의 바이너리 파일을 전달받도록 하자.
/*  DEPENDENCIES */
const express = require('express');
const bodyParser = require('body-parser');
const cors = require('cors');
const multer = require('multer');

const app = express();
const port = process.env.PORT || 5500;

app.use(express.static('public'));
app.use(cors());
app.use(bodyParser.urlencoded({ extended: true }));
app.use(bodyParser.json());

/* Setup File upload */
const upload = multer({
  limits: { fileSize: 5 * 1024 * 1024 },
  storage: multer.diskStorage({
    destination(req, file, cb) {
      cb(null, 'avatars/'); // avatars 폴더에 파일을 저장한다.
    },
    filename(req, file, cb) {
      cb(null, file.originalname); // 전송된 파일 자신의 이름으로 파일을 저장한다.
    }
  })
});

/* ROUTERS */
app.post('/upload', upload.single('avatar'), (req, res) => {
  console.log('UPLOAD SUCCESS!', req.file);
  res.json({ success: true, file: req.file });
});

app.listen(port, () => console.log(`Server listening on port ${port}`));
클라이언트에서 전송한 바이너리 파일은 avatars 폴더에 저장된다.
2.Frontend
파일 구성은 아래와 같다. 전체 소스코드는 이곳에서 참조할 수 있다.
src/
  ├── app/
  │   ├── file-upload/
  │   │   ├── file-upload.component.css
  │   │   ├── file-upload.component.html
  │   │   └── file-upload.component.ts
  │   ├── app.component.ts
  │   └── app.module.ts
  └── assets/
      └── images/
          └── john-resig.jpeg
먼저 컴포넌트 템플릿을 작성한다. bootstrap을 사용하므로 인스톨과 .angulr-cli.json에 설정이 필요하다.
<div class="container">
<div class="row">
<div class="col-sm-8 col-sm-offset-2 col-md-6 col-md-offset-3">
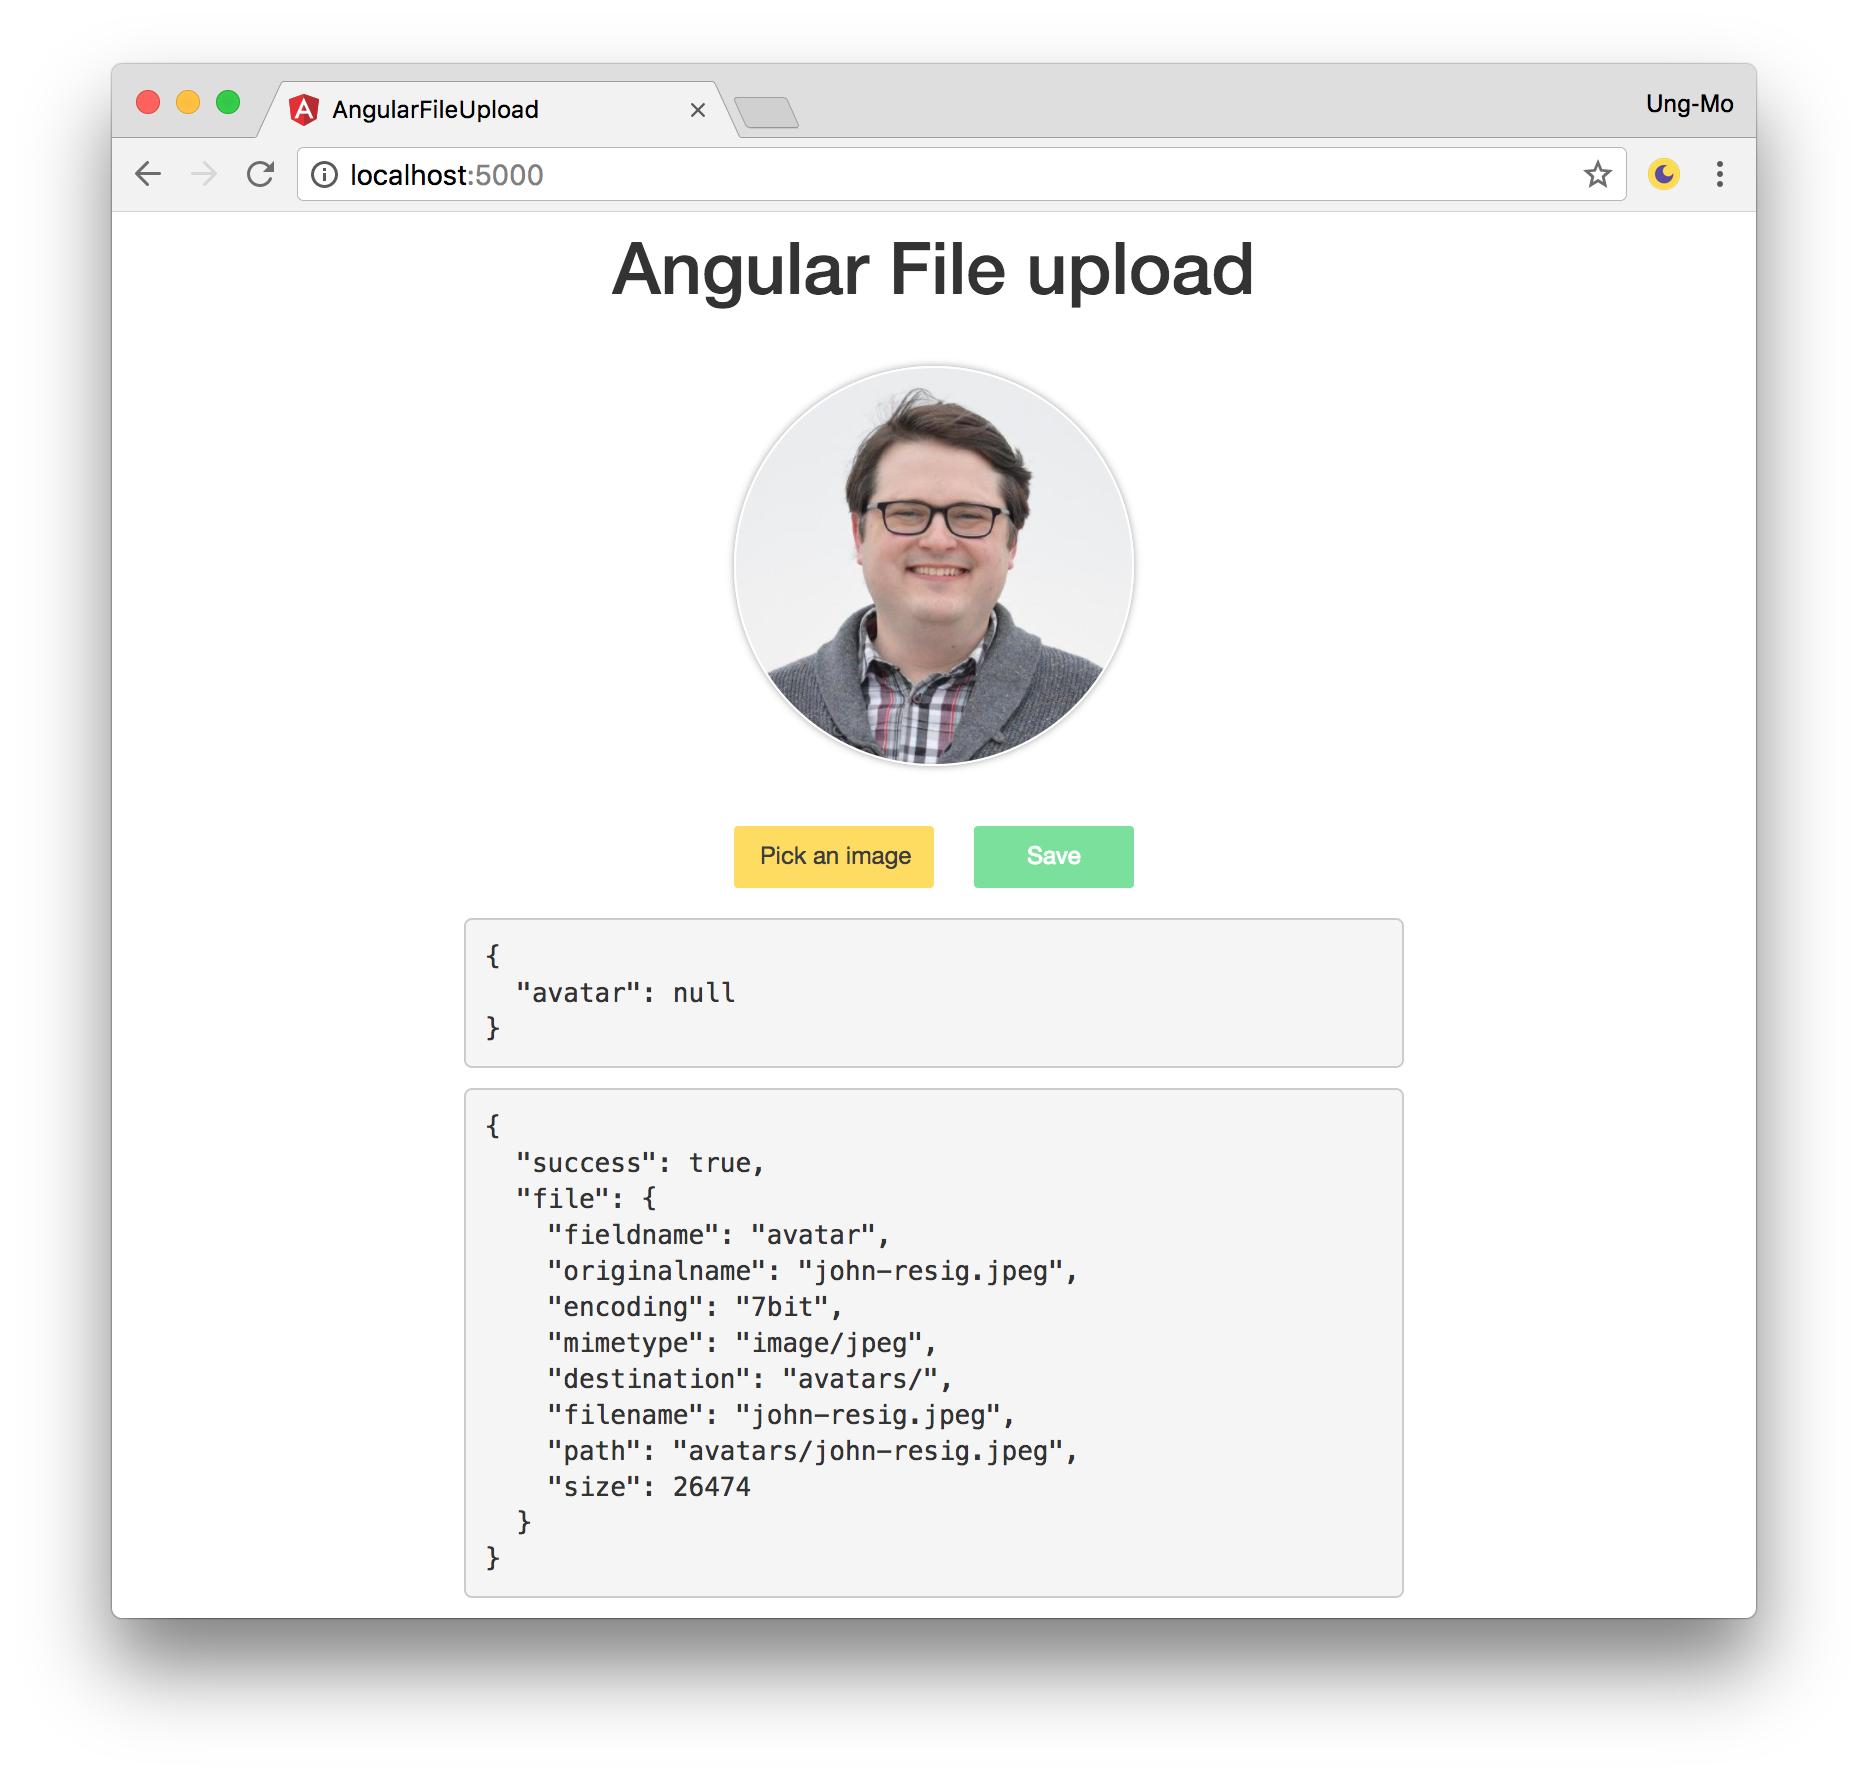
<h1 class="text-center">Angular File upload</h1>
<form [formGroup]="form" (ngSubmit)="onSubmit(fileInput.files)">
<div class="form-group">
<img *ngIf="imageSrc" [src]="imageSrc" class="avatar">
<div class="btns clearfix">
<label class="btn btn-file btn-cancel pull-left">Pick an image
<input type="file" accept="image/*"
(change)="onFileChange(fileInput.files)" #fileInput>
</label>
<button type="submit" class="btn btn-save pull-right"
[disabled]="form.invalid || loading">
Save
<i class="fa fa-spinner fa-spin fa-fw" *ngIf="loading"></i>
</button>
</div>
</div>
</form>
<pre>{{ form.value | json }}</pre>
<pre>{{ result | json }}</pre>
</div>
</div>
</div>
이미지 파일만을 업로드하기 위해 accept 어트리뷰트를 사용한다. 버튼을 클릭하여 파일을 선택하면 해당 파일의 정보가 files에 담겨 전달된다.
<input type="file" accept="image/*"
  (change)="onFileChange(fileInput.files)" #fileInput>
이때 주의하여야 할 것은 파일의 경로는 전달되지 않는다는 것이다. 이는 브라우저가 보안 문제로 인해 파일 경로의 참조를 허용하지 않기 때문이다. 따라서 선택한 파일의 프리뷰를 위해서 FileReader 객체를 사용한다. FileReader 객체는 readAsDataURL 메소드를 제공한다. 이 메소드는 바이너리 파일의 내용을 base64 인코딩된 스트링 데이터로 반환한다. 이 값을 이미지 프리뷰를 위한 img 태그에 프로퍼티 바인딩한다.
<img *ngIf="imageSrc" [src]="imageSrc" class="avatar">
컴포넌트 클래스는 아래와 같다.
import { Component } from '@angular/core';
import { FormGroup, FormControl, FormBuilder, Validators } from '@angular/forms';
import { HttpClient } from '@angular/common/http';

@Component({
  selector: 'app-file-upload',
  templateUrl: './file-upload.component.html',
  styleUrls: ['./file-upload.component.css']
})
export class FileUploadComponent {
  apiUrl = 'http://localhost:5500';

  form: FormGroup;
  loading = false;
  imageSrc = '/assets/images/john-resig.jpeg';

  result; // file upload 수행 이후 서버로부터 수신한 데이터

  constructor(
    private fb: FormBuilder,
    private http: HttpClient) {
    this.form = this.fb.group({
      avatar: ['', Validators.required]
    });
  }

  onFileChange(files: FileList) {
    if (files && files.length > 0) {
      // For Preview
      const file = files[0];
      const reader = new FileReader();

      /* 브라우저는 보안 문제로 인해 파일 경로의 참조를 허용하지 않는다.
        따라서 파일 경로를 img 태그에 바인딩할 수 없다.
        FileReader.readAsDataURL 메소드를 사용하여 이미지 파일을 읽어
        base64 인코딩된 스트링 데이터를 취득한 후, img 태그에 바인딩한다. */
      reader.readAsDataURL(file);
      reader.onload = () => {
        this.imageSrc = reader.result;
      };

      /* reactive form에서 input[type="file"]을 지원하지 않는다.
        즉 파일 선택 시에 값이 폼컨트롤에 set되지 않는다
        https://github.com/angular/angular.io/issues/3466
        form validation을 위해 file.name을 폼컨트롤에 set한다. */
      this.avatar.setValue(file.name);
    }
  }

  onSubmit(files: FileList) {
    const formData = new FormData();
    formData.append('avatar', files[0]);

    this.loading = true;
    // Send data (payload = formData)
    console.log(formData.get('avatar'));

    // 폼데이터를 서버로 전송한다.
    this.http.post(`${this.apiUrl}/upload`, formData)
      .subscribe(res => {
        this.result = res;
        this.loading = false;
        this.avatar.setValue(null);
      });
  }

  get avatar() {
    return this.form.get('avatar');
  }
}
이미지 파일 프리뷰를 위해 <input type="file">의 상태가 변경되면 FileList를 이벤트 핸들러에 전달한다. 이 FileList를 FileReader 객체의 readAsDataURL 메소드로 읽어들여 img 태그에 그 결과값을 바인딩한다.
서버로 파일을 전송할 때에도 <input type="file">가 받아들인 FileList를 사용한다. 이때 FormData 객체의 append 메소드를 사용하여 FileList의 첫번째 요소를 FormData 객체에 추가한다. 그리고 이 객체를 페이로드로 서버에 전송한다.